Showing posts with label gluten-free. Show all posts

Sunday, July 24, 2016

Finally, a decent gluten-free cupcake!


A few weeks ago, I volunteered to make desserts for my friend Felicity's wedding shower. As she and I are both trying to cut down on our gluten intake, I decided to take another run at gluten-free baking. I mean, it's not like a wedding shower is a high pressure situation, suitable for a first attempt at a new recipe, right? ;) So I decided to make a few dozen mini peach tartlets and a couple dozen carrot cupcakes -- all gluten-free. And much to my delight, both came out deliciously. Things turned out so well, that I actually am whipping up another batch of cupcakes right now, which I'll be bringing to a pool party after work tomorrow. Just a dozen this time around.

Here, for your gluten-free recipe box, is a little something I adapted from the Divas Can Cook blog. I think even the decidedly un-diva-like Bugs Bunny would approve of these....

Gluten-free Carrot Cupcakes
Makes 1 dozen cupcakes

Ingredients

CUPCAKES
  • 1/2 cup white sugar
  • 1/4 cup brown sugar, packed
  • 1/2 cup olive oil
  • 1 egg + 1 egg yolk
  • 1 cup all-purpose gluten-free flour
  • 3/4 tsp baking powder
  • 1/2 tsp baking soda
  • 1/4 tsp salt
  • 1 1/2 tsp cinnamon
  • 1/4 cup buttermilk (or milk + a splash of white wine vinegar)
  • 1 1/2 tsp vanilla extract
  • 1 1/2-2 cups carrots, finely shredded (I used a little over 2 cups)
  • 1/4 cup coconut flakes, finely shredded
FROSTING
  • 4 oz cream cheese, room temperature
  • 2 TBSP butter, room temperature
  • 1 cup confectioners sugar (may need more to thicken if desired)
  • 1/2 tsp vanilla extract
Instructions

Preheat oven to 350 F. (Or if it's my not-so-great electric oven, 375F. Don't ask.)

Prep a dozen muffin tins with paper liners (or grease with a thin layer of butter, then dust with flour.)

In a large bowl beat oil, both sugars, and eggs. Set aside.

In a separate bowl whisk together flour, baking powder, baking soda, salt, and cinnamon.

Gradually add the dry ingredients into the wet ingredients, alternating with the buttermilk. Mix just until just combined.

Fold in shredded carrots, coconut flakes, and vanilla.

Pour batter into prepared muffin cups. (I used a 1/4 cup measure.)
Bake for 18-20 minutes, until a toothpick inserted into the center of a muffin comes out clean, then cool in baking pan on a wire rack on the counter.


Prepare the frosting by first creaming together the butter and cream cheese.

Add in the confectioners sugar and vanilla.

Mix until silky and creamy. Add more sugar if a thicker texture is needed.

When cupcakes, are cooled remove them from pans and frost.

Note: Unfrosted cupcakes will keep on the counter for 1-2 days, or in the fridge for a handful of days. Unfrosted cupcakes can be stored in the freezer for a couple of months.


Sunday, January 25, 2015

Pancakes for one

I don't understand how people overeat when they're depressed. In my experience, breakups are Nature's appetite suppressants.

Cooking for one? What's the
pointSo much about the eating experience for me is about *sharing* meals and conversation, about nurturing those I care about with wholesome and delicious dishes. How many times this week have I opened the fridge and been completely disinterested? Who am I going to share good food and scintillating conversation with now that yet another relationship has tanked? My houseplants? The worm bin residents? My bicycle? Bah. Looks like cheese and crackers for dinner again. (It's a good thing I've had lots of cooking classes to teach, else I'd have wasted away altogether: who can resist sampling mashed sweet potatoes with maple syrup and garden thyme prepared by 2nd graders, or beet and apple salad hand-grated by 4th graders, or spicy kale chips baked by middle schoolers? Not me. It may be significantly more lonely in my apartment these days, but thanks to my students at least I'm managing to get some good food in me a few times a day during the school week.)

The most depressing meal to prepare and eat alone, I've decided, is not dinner (partly because it's socially acceptable to have a couple glasses of wine during dinner) but weekend breakfast. You know, that time when one lazes around a bit in bed, snuggling and maybe dozing awhile before putting on some espresso and bustling about the kitchen to assemble a little something tasty for two. And then sometimes heading back to bed? That's the time I'm talking about, when loneliness is the most stark. Well, I'm tired of feeling sad. And today, for the first time in a week, I woke up hungry. So this morning, since I had minimal supplies around -- I am less motivated to buy food when self pity hits, too -- I decided to try a recipe my friend Carina had mentioned to me a few days ago: 2-Ingredient Pancakes. I had both ingredients and somehow this morning the idea of making pancakes for one seemed less pathetic than it did last weekend. Maybe it was the unexpected sunshine pouring through my bedroom window when I awoke. Maybe it was the fun time I spent with my dear friend Quynh last night. Maybe I'm starting to heal. Whatever the reason, the result was delicious and I devoured the whole plateful myself. And so, dear readers, single and otherwise, I offer you my adaptation of:

Flourless Banana Pancakes for One
Makes about 3 pancakes

Ingredients

  • 1 medium, ripe banana
  • 1 large egg (or probably two small ones would work, and yield an extra flapjack)
  • 1 pinch baking powder
  • 1 large pinch ground cinnamon
  • butter

Directions
  1. Heat a skillet on the stovetop to medium heat.
  2. In a small mixing bowl, mash banana well with a fork. (There can be small lumps, but you don't want big banana globs or it will be weird.)
  3. Mix in the egg, then baking powder and cinnamon.
  4. When pan is hot, add a small pat of butter, which will melt and coat the bottom of the pan.
  5. Pour a Tablespoon or so of batter into the pan and cook your awesome little pancake until the bottom appears set (20-30 seconds, when you see a couple small bubbles pop on top), then flip with spatula and cook another 10 seconds or so til cooked through, but not burnt.
  6. Repeat with remaining batter. Serve warm with butter and syrup.

I suspect this recipe scales up just fine, but it is handy to have a 2-ingredient, 3-pancake recipe around.

Wednesday, November 19, 2014

Bountiful broccoli

I do love broccoli. I couldn't resist picking up a few heads at the farmers' market a couple of weeks ago. It was just gorgeous, so I bought more than I should have for a person who lives alone and eats a diverse diet. Yes, I was downright brassica rich. After making a couple of batches of my favorite broccoli (with garlic, crushed red pepper, raisins, and almonds), and a couple of stirfries, I still had a few heads of the beautiful green veggie in the fridge. So I went to one of my favorite food blogs, Food52, for some inspiration. And inspiration I found.

I made a few adjustments, of course: more garlic, because the original recipe only called for 2 cloves(!), and the addition of a celery root because I had one and also because it turned out that when I measured it I did not actually have quite as much broccoli as I thought. (Must be those midnight elves who sneak in and eat my produce while I sleep... but who, alas, don't seem inclined to do the dishes while they're in my kitchen.) The result was so delicious, I made another big pot of it the following week, when a canceled class left me with a plethora of extra broccoli. It turned out perfectly again.

Since this recipe is too good not to share, I offer you:

Roasted Broccoli and Celery Root Soup
Serves 4-6

Ingredients

  • 2 heads broccoli, cut into florets, with stems peeled and cut into bite-sized chunks
  • 1 celeriac, peeled, cut into 1-inch chunks
  • ¼ cup olive oil
  • 4-5 cloves garlic, peeled and smashed
  • salt and freshly ground pepper
  • 4-6 cups stock (depends on how thick you want your soup)
  • ½ cup finely grated Parmesan
  • juice from 1 lemon

Directions

Steam broccoli and celeriac til broccoli turns bright green. Drain well, set aside.

Add the olive oil and garlic to the pot, cook over medium heat for 2 mins, then add the broccoli and celeriac, seasoning with salt and pepper.

Cover the pot, turn the heat down as low as it will go, and cook for about an hour, stirring occasionally, until the broccoli is soft enough that it yields when you press it with the back of a wooden spoon (it may brown a little during this process -- this is a good thing).

Add stock and bring to a boil over medium-high heat. Simmer the soup for 5 minutes.

Puree half the soup in a blender or food processor. Stir the puree back into the pot.

Stir in the Parmesan and lemon juice to taste. Enjoy!

Monday, November 10, 2014

Don't be a jerk

I've been craving black bean soup like crazy as the temperatures have started dropping to serious winterlike levels, so the other day I started soaking a couple cups of dry black beans. The next day I drained them and started simmering them with a spoonful of ground cumin and ginger (which I had heard helps to reduce the gas these delicious legumes are known to produce) in a fresh batch of water. I drained my softened beans, got out a lime and some more ground cumin, and because I could not for the life of me recall what all else I needed, I called the woman who makes some of the best black bean soup I've had in my life: my mom.

She graciously unearthed the index card, handwritten copy of the recipe that I've been enjoying since middle school, and dictated it to me over the phone. I was surprised at how simple it was: 2 cans of black beans, water, a lime, and Jamaican jerk spice. That's it. Delicious. But I was scandalized. "Jamaican jerk spice?? What about cumin? Cilantro? Chili? At least an onion, right??" Nope. All the flavor comes from the jerk seasoning. What's in that, anyway?

I did just finish a series of FoodPrints lessons teaching 3rd graders to be avid readers of ingredient labels, after all. Yep, it was as I suspected: lots of salt. I could do better than this, I decided. Plus, it was awfully cold outside and I wanted to avoid a trip to the store to purchase my single missing ingredient. I would work with what I had around the kitchen.... The result was delicious (though it will never quite replace my mom's recipe and its plethora of fond memories).

Black Bean Soup (from scratch)
Makes 4-6 servings, depending on how hungry you are

Ingredients

  • 2 cups dry black beans, soaked overnight, simmered until soft, then drained
    (you can use 3-4 cans of beans, but they're pricier and less nutritious -- just sayin')*
  • 6 cups vegetable stock (make your own!)
  • olive oil
  • 1 medium onion, peeled and diced
  • 2 shallots, peeled and finely diced
  • 3-4 garlic cloves, peeled and finely minced
  • 1/2 - 1 fresh jalapeno pepper, seeds removed then finely minced
  • 1-2 tsp ground cumin
  • 1/2 tsp fresh thyme leaves (or 1/4 tsp dried)
  • a sprinkle (1/4 tsp?) cayenne
  • a sprinkle of ground nutmeg
  • a sprinkle of ground cinnamon
  • a pinch or two of ground allspice
  • 1-2 tsp tamari (or soy sauce, but I swear tamari is better)
  • juice from 1 lime (2 TBSP, roughly)
  • salt and black pepper, to taste
  • plain greek yogurt (optional), for garnish
  • fresh cilantro (optional), for garnish
  • additional lime wedges, for garnish
Directions

  1. Heat a medium pot with a few glugs of olive oil, then stir in onions and cook over low heat until soft, stirring occasionally so things don't stick too much (5-10 minutes).
  2. Stir in the shallots, garlic, and jalapeno and cook for another 1-2 minutes.
  3. Turn up the heat as you stir in the cumin, thyme, cayenne, nutmeg, cinnamon, allspice, and tamari,
  4. When these have sizzled for about a minute, stir in most of the beans (I set aside about 1/2 cup) and all of the broth. Simmer for 10-15 minutes.
  5. Remove from heat, puree the soup, then stir in the remaining beans and the lime juice. Taste, then season with salt and pepper if needed.
  6. Serve hot with a dollop of yogurt and a sprinkle of cilantro leaves, along with a lime wedge for folks to squeeze in just before eating. I also made some cheddar jalapeno corn muffins because, hey, what is black bean soup without cornbread?
*Check out this previous post for some tips on cooking dry bean.

Tuesday, September 2, 2014

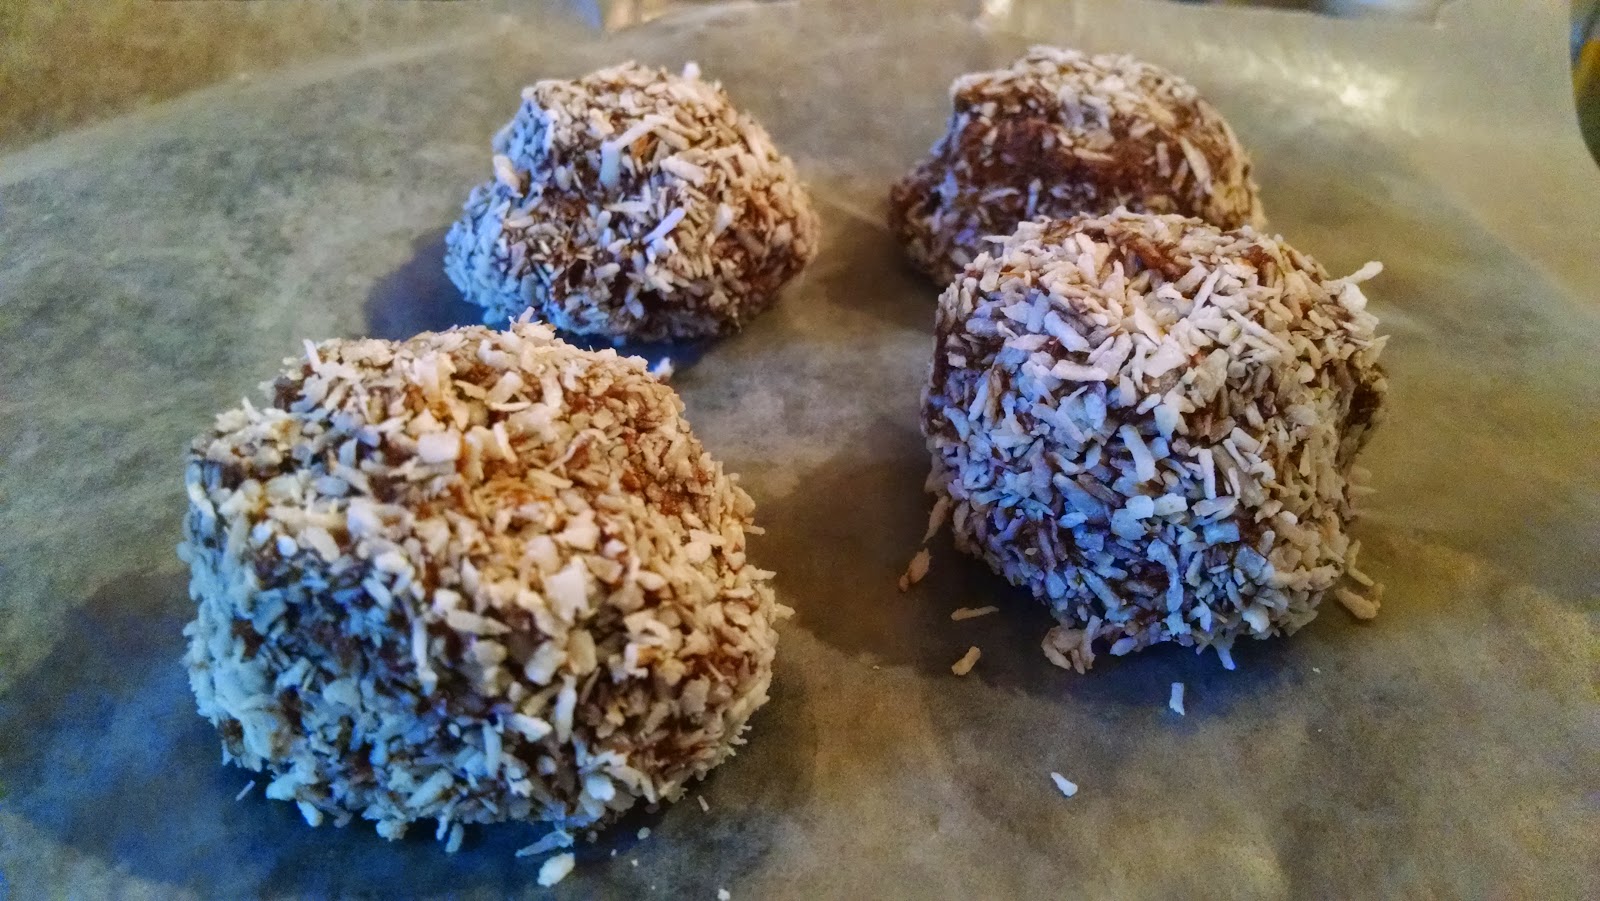
Chocolate sweet potato truffles


One of my favorite pastimes these days is taking on too many things at one time. Take today, for instance....


Things started bright and earlier than usual with a 5th grade team meeting across town, followed by an impromptu curriculum planning meeting. By 10am, it was time to continue on to check on the garden at Tyler after the long, rainy weekend, then head to Whole Foods to shop for the cheffing gig I would spend the rest of today cooking for...sorry, I couldn't end that sentence with a preposition. In the midst of all this, I've been trying to keep up with the women's quarterfinals and men's round-of-sixteen of the U.S. Open. It's no surprise that this week's cheffing dessert wound up being something quick, easy, and shaped like a tennis ball....

Chocolate Sweet Potato Truffles
Recipe adapted from http://www.livehealtheasy.com.

Ingredients
1 large sweet potato
2 TBSP honey
2 TBSP coconut oil
½ cup almond flour
¾ cup cocoa powder
¼ cup shredded, unsweetened coconut
for dusting: ½ cup or so of shredded coconut, ground nuts, and/or cocoa powder

Directions
  1. Wrap sweet potato in foil and bake at 400F til soft (I did about 45 mins, then let it cool in the foil, where it continued to steam and loosen the skin for easy peeling).
  2. Peel cooled sweet potato, then mash with coconut oil and honey.
  3. Stir in almond flour, cocoa powder and mix well.
  4. Refrigerate until dough is a little more of a playdough consistency – at least 30 minutes.
  5. Put your “dusting” ingredient(s) in a small bowl.
  6. Use a large spoon – I used a Tablespoon – to coop out sweet potato mixture and use your fingers to gently roll your chocolatey blob around in the dusting bowl until it forms a ball-like shape.
  7. Place rolled truffles on a plate or tray lined with waxed paper and slide them into the fridge for at least 1 hour to set (or into the freezer for 20 minutes if you happen to be a poor manager of time while as you watch the U.S. Open while trying to keep up with an ambitious personal cheffing schedule…).
  8. Enjoy!

Did I mention these are gluten-free? Yep, that means no back pain, no matter how many I eat. Luckily this batch should come out to at least a dozen or so....

Sunday, June 1, 2014

Good morning kisses

It's not often that I come skipping into the kitchen on a Friday morning at 7am. (Usually, I am either still asleep then, or grumpy that I'm not still asleep then and rummaging around the fridge for a snack because of course if I'm up at that hour I'm starving.) But THIS Friday, when I woke up to get ready for a morning teaching stint, I had chocolate meringues to wake up to. Ahhh....


Before I proceed any further, let me just thank two amazing mothers: my own (who gave me the standing mixer) and my boyfriend's (who gave me the idea to make these most delicious of confections that, until last weekend, I had never heard of before). FINALLY, a good use for all of the dang egg whites I keep generating with all of these custard desserts I keep making.

I know, it's a tough life.

Speaking of tough, consider the half year of unemployment of my poor standing mixer. Since I've more or less given up gluten, and thus bread-making, he's been sitting there sulking, stashed in a large tote bag under a table in my kitchen for the better part of the past six months. But now look at him: beating egg whites and sugar and cream of tartar like a champ:


Though I was nervous, after my only other attempt at meringues a handful of years ago failed miserably, I opened up my oven last Friday morning to two trays of delicate, perfectly set cookies with melty chocolate centers. At first, I was actually a little worried they hadn't cooked all the way through -- they seemed a bit sticky on the outside, where I recalled meringues of my childhood being quite dry -- so after taste-testing one (purely to be sure that I would be the only one suffering from food poisoning, should it happen from undercooked cookies) I turned the oven on the lowest setting for about a half hour while I got ready for work. I taste-tested another one, which was a bit more firm, turned off the oven once more, and headed out the door.

The rest of the two dozen cookies disappeared over the next two days during a series of picnics, brunches, and raidings of my kitchen by a meringue-crazed boyfriend.

They were perfect. So I'm sure you'd rather I just stop yammering here and get to the recipe. Here you have it: an adaptation of the (in)famous "Forgotten Kisses."(There are some really great tips and visuals here, for those of us new to the meringue-making racket.)

Chocolate Meringues
(almost foolproof)
Makes about 2 dozen cookies

Ingredients
  • 3-4 egg whites, at room temperature
  • 1/8 teaspoon cream of tartar (er, so, like half of your 1/4 tsp spoon)
  • 1/8 teaspoon salt
  • 3/4 cup sugar, finely ground in your coffee grinder (and if it comes out a little coffee-flavored, well then, enjoy the mocha meringues!)
  • 1/4 teaspoon vanilla extract (or peppermint extract, which I am to try next)
  • ½-1 bag Ghirardelli dark chocolate chips

Directions

Set racks in upper and lower thirds of the oven and preheat oven to 400°F. Line two baking sheets with parchment paper.

In the bowl of a standing mixer, fitted with the whisk attachment, beat the egg whites on medium speed until foamy and frothy, about 20 seconds.

Add the cream of tartar and salt; beat on medium-high speed until fluffy and soft peaks form, 45-60 seconds.

Add the sugar, a little at a time, and continue beating until glossy and stiff, 4-6 minutes.

Beat in the vanilla extract, then fold in the chocolate chips with a rubber spatula or wooden spoon.

Use two spoons to drop heaping tablespoons on the prepared baking sheets about an inch apart. (They don't really spread, so you can put 'em quite close together if you're short on space.)


Place the cookies in the oven, shut the door and turn the oven off. Leave the cookies in the oven for at least 8 hours or overnight to cook.

When completely cool, store in an airtight container…in you can resist eating them all on the spot, that is.

Thursday, February 13, 2014

Falling off the gluten wagon


Nothing like a trip to New Orleans to knock even the most disciplined eater off the gluten-free wagon. I could only hold out for so long, which turned out to be approximately one hour, as the friendly hostess of the airbnb home we stayed at had baked us fresh oatmeal cookies to welcome us for the long weekend. It was all over. Po' boys. Beer. Beignets. Seriously, who could resist cafe au lait and beignets in The Big Easy? Well, the gluten gluttony did end eventually, and after a weekend of eating and drinking and biking around in 70-degree days and listening to live jazz late into the night, Kenton and I returned to chilly DC, and I returned to a gluten-free diet. Mostly.

I mean, today was yet another snow day, and I needed something to go with my soup....


Well, maybe tomorrow I'll swear off gluten again. Or maybe the day after, just in case there's a tasty Valentine's dessert on the menu.

Tuesday, January 21, 2014

Fraiche pasta?

Tonight, in spite of my best laid plans to heat up yet another batch of curried lentils and roasted root vegetables, I found myself holding a box of angel hair pasta and could not bring myself to put it down. Maybe it's the cold weather. Or the fact that most of my personal cheffing has been for a couple who are trying to cut out carbs. Or the ferocious cravings for hearty, comforting pasta that I've been having since, oh, early November since I resolved to cut gluten out of my diet.

(Obviously I've fallen off the wagon a few times during the holidays. And more recently when we had a Slow Food gathering at a local brewpub. And just yesterday when friends recently returned from Paris handed me a gift of smuggled, fresh macarons. But I do try, because my body seems to hurt a lot more when I indulge. I noticed a marked increase in low back pain this morning, likely due to my polishing off a half dozen macarons while soaking in the bathtub last night.)

At least this was a box of rice-based pasta in my hand tonight.

Now, I will say that most gluten-free food items that attempt to mimic the real, glutinous (and delicious) thing fall way short. Including pasta. The biscuits that I attempted a week or so ago were weirdly textured such that I actually attempted to pass them off as sweet potato scones. (True story. Embarrassing.) I don't even bother with gluten-free beer. (Oh, beer, nectar of the gods, I've been missing you!) But I digress (again). Tonight I had a hankering for pasta that would not quit, exacerbated by my stumbling across a delicious sounding concoction while I poked around online for inspiration for what to do with my leftover creme fraiche from yesterday's cheffing. (BTW, if I ever find myself in Indianapolis, home to the farm-to-table restaurant from whence this recipe hails, I'm totally going there for dinner.) It was so spectacularly tasty and simple, and for once I had all of the ingredients on hand (and it's likely you will, too), that I offer the recipe, slightly adapted and using way fewer dishes, here:

Lemony Fraîche Pasta

Ingredients
  • 8 oz. box dried angel hair pasta (gluten-free rice pasta is pretty good in this one!)
  • salt
  • 1-2 handfuls fresh parsley leaves, washed and finely chopped
  • 1 garlic clove, peeled and finely minced
  • zest of 1 lemon (have a microplane? use it!)
  • ½ cup crème fraîche
  • 2 TBSP olive oil
  • Juice from 1 lemon
  • 1-2 handfuls Parmesan cheese, finely grated (you can reuse the microplane here, heheh)
  • a pinch of red pepper flakes
  • freshly ground black pepper


Directions

Bring a large pot of salted water to a boil. Add the pasta and cook until al dente, according to the package instructions (usually 5-7 minutes, but if your package tells you to rinse the noodles in cold water after draining, please ignore that part).

Meanwhile, in a large bowl, combine the parsley with the garlic and lemon zest, mixing until just combined. Stir in the crème fraîche with the olive oil and lemon juice until combined. Stir in parmesan and red pepper flakes. There, your sauce is done.

When the angel hair is cooked, use tongs to transfer it directly to the bowl with the sauce. Toss the spaghetti until the sauce coats the noodles evenly. (The pasta water clinging to the noodles will help to thin the sauce.) Season to taste with salt and pepper.

Dust with more parmesan if you like and devour while hot!


This pic was snapped before I dusted both pasta and salad with some fresh parmesan -- partly in honor of the winter storm's dusting of my city with snow earlier today, though just in case you're wondering I did not add 5-7" of grated cheese to my noodles.

Tuesday, March 19, 2013

Cutting the mustard

Readers, please don't think for a moment that I have abandoned you. Tales are forthcoming about community garden workdays and cooking lessons and working with various farmers markets leading up to the start of the season. (Farmers' market season, that is, though tax season is also breathing down my neck.)

Today -- or tonight, rather -- I offer a simple recipe, one which I have been fiddling with for a couple of years now. I recall the evening my friend Vinnie and his partner had me over for dinner those many nights ago, toward the end of which I left with an old issue of Saveur magazine that contained the base recipe for my now much beloved mustard recipe. There are a few standard ingredients -- namely, the ground spices -- and there are some variables: 1) mustard seeds, 2) vinegar, and 3) beer. The variations on this theme are endless.

The original recipe calls for stout, brown mustard seeds, and red wine vinegar. I tried that the first time and it was inarguably delicious. I gave most of it away as Christmas gifts that first winter. Necessity -- i.e., it being too cold out some nights to head out on my bike when I'd sense the first tinglings of a mustard craving -- has led me to try everything from balsamic to apple cider vinegar, and all kinds of mixes in between. I've sometimes snagged a few cups of yellow mustard seeds, and other times the smaller dark seeds, and still other times a mix of the two from dad (who should probably start buying stock in bulk mustard seed, considering his frequenting of the Middle Eastern spice shop since I picked up this mustard making habit). I've experimented with porters, English ales, apricot ales, my own pumpkin ale. Most recently, one of the last bottles of the Tall, Dark, and Belgian made its way into a batch of exceptionally spicy, stone-ground mustard. (The real secret that puts the current batch over the top? Garple.) Slathered on corned beef for a St. Patrick's Day gathering or two this weekend, stirred into horseradish for a sandwich, or mixed into salad dressings, I assure you, this mustard holds its own.

Okay, enough stalling: here's the recipe so you can make your own
Basic Spicy Mustard

Ingredients

  • 12-ounce bottle of beer
  • 1 1/2 cups whole mustard seed
  • 1 cup vinegar
  • 1 TBSP salt
  • 1 TBSP freshly ground black pepper
  • 1/4 tsp ground cinnamon
  • 1/4 tsp ground cloves
  • 1/4 tsp freshly grated nutmeg
  • 1/4 tsp ground allspice
Directions

Combine all ingredients in a glass, plastic, or ceramic mixing bowl (or if you're really careful with the beer pouring, this fits EXACTLY into a glass quart jar -- yeah, I just threw down that challenge).

Cover with a towel or recycled sandwich bag and let the mixture sit on your counter for about 2 days. This allows the flavors to talk to each other and the mustard seeds to soften.

Puree in a food processor, pausing occasionally to scrape down the sides of the bowl. After about 3 minutes, you'll suddenly see the mustard thicken and become creamy. (It's kind of like magic. At least Kenton and I think so.) You're done! And friends and family will be so impressed, while you secretly know all it took were a few simple ingredients and a couple days of patience.

You can smear some on a sandwich right then, but be sure to put the rest into a glass container, or a few smaller containers, and store in the refrigerator. It starts off quite spicy, but it'll mellow after a few weeks. Use it within about 6 months... not that I've had ANY mustard last that long around here....

Thursday, February 14, 2013

Cabbage coming out of my ears


I have spent the better part of the past two weeks preparing and eating cabbage -- a vegetable that I never particularly cared for in the past, one which usually ended up in a jar of kim chi for lack of inspiration on my part. But I had an assignment: find a tasty soup that included cabbage...that a 5th grader could help to prepare and then would actually eat. Ah, a challenge, to be sure!


Testing out various cabbage-based soups was part of my recipe research for a FoodPrints' 5th grade lesson, which, like all FoodPrints lessons, would include a hands-on communal cooking component. The final cabbage soup recipe became part of a pretty great lesson centered around WWII Victory Gardens -- a lesson made especially awesome by the inclusion of incredible historic resources like the 1940s ration books and stamps that my co-instructor Barbara found in her parents' attic. During our discussion and activities about rationing, the kids really seemed to get the sense of urgency, the critical importance of resource conservation, and the self-sufficiency that families on the American home front exhibited during World War II. Not only that, but they turned around and started volunteering all kinds of great ideas about why and how kids today should conserve resources and encourage their peers and neighbors to garden today. It warmed my heart. And the soup warmed my body. (Thank goodness for that with these recent freezing temperatures!)

We made two big batches of cabbage soup during last week's classes and I've got two more classes -- and thus two more giant pots of cabbage soup to make -- next week. Good thing I've grown to love cabbage and beans. And after a taste of the final recipe, it appears that a whole lot of 11-year-olds have, too. They were clamoring for seconds like you wouldn't believe!

Tuscan Bean and Cabbage Soup

This recipe is adapted from TheSoup Bible. (Thanks, mom and dad, for this timely Christmas present!) There are many versions of this soup which uses ingredients many American families would have grown in their World War II victory gardens. This one uses white beans, leeks, and cabbage. It is especially great alongside whole wheat toast with fresh herb butter.

Ingredients
  • 3 tablespoons extra-virgin olive oil
  • 1 medium yellow onion, diced
  • 2 medium leeks, white and light green parts only, well-rinsed and sliced
  • 1 large potato, scrubbed and diced
  • 2 garlic cloves, peeled and minced
  • 2 cups of dry white beans, pre-cooked and drained
    (or one 14-ounce can of cannellini beans, drained)
  • 4 cups chicken or vegetable broth
  • 2 generous cups green cabbage, cored and thinly sliced
  • ½ cup fresh parsley leaves, washed and chopped
  • 2 tablespoons chopped fresh oregano (or 1 tablespoon dried oregano)
  • 1 jar of canned tomatoes, chopped
  • coarse salt and ground pepper
  • ¼ cup freshly grated Parmesan cheese
Directions

In a large Dutch oven or heavy pot, heat oil over medium-high. Add onion, leeks, potato, and garlic.  Cook, stirring occasionally, until softened, about 5 minutes. Add stock. Stir in cabbage, parsley, oregano, beans, and tomatoes. Bring soup to a boil, then reduce to a rapid simmer. Cover and cook until vegetables are tender, about 20 minutes. Remove from heat. Season with salt and pepper.

Spoon out about 1/3 of the soup into a food processor or blender and process until smooth. Return puree to the soup pot and stir together. Ladle soup into bowls and sprinkle with a generous spoonful of Parmesan.

(It's okay that I'm putting the recipe up: the free, open-source FoodPrints lessons will be posted online soon!)